Home Page
Fleximate Power Cart
Features & Benefits
Quixxstart Kits
Fittings
Tubing
Roller Track
Casters
Levelers/Feet
Towable Cart
Accessories
Accessories II
Custom Applications
Design Guide
Contact Us
Worksmart Systems
    Modular Assembly Cells

Fittings

Our fittings are stamped from high quality steel. They are designed for maximum clamping and holding force and can be used and reused. The finish is a tough black oxide that is chip and rust resistant. For further tube retention many of the fitting bodies have 2 deep stamped ribs which help grip the tubes. This insures structural rigidity and design integrity.


Part # QC-1 Tee 90

Part # QC-1C Cut Tee

Part # QC-2 Elbow

Part # QC-3 4 Way Cross

Part # QC-4 3 way Cross

Part # QC-5 5 Way Cross

Part # QC-6 4 Offset 90

Part # QC-6A 4 Cut 90 Offset

Part # QC-7 4 Pivot Tee

Part # QC-8 Parallel Hinge

Part # QC-10 Tee Hinge

Part # QC-11 Parallel

Part # QC-13 Universal

Part # QJ-140 Bushing
For Use with Part # QC-8 and QC-10

Part # QC-45 Complete

Part # QC-1P Tee Fitting

Clamptight® Make it Permanent or Semi-Permanent

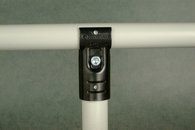
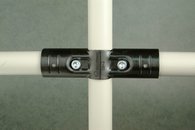
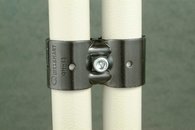
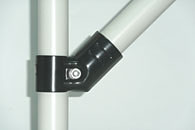
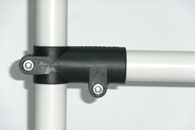
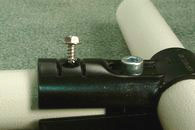
Each fitting also features our patent pending Clamptight® hole design that allows you to make your rack construction semi or fully permanent (Photo 1 below). Each fitting has a 4 mm hole punched through it, providing a pilot hole to affix the fitting to a tube. For semi permanent applications the tube can be fastened with a #8 TEK (Photo 2 below) for permanent applications use a 4.2 mm drill and an Avdel #1624-D514 blind rivet (Photo 1 below). Both the self drilling fasteners, rivets and 4.2 mm bit are available from Quixxsmart. Benefits of the Clamptight® feature are:

  • Structural integrity for higher loads
  • Vibration proofing, in active load applications
  • Maximum tube retention for carts and tugging applications
  • The rivet provides a tamper proof design
  • Ease of application with the integral pilot hole
  • Can be used as a safety check to insure that the tube has been fully inserted and seated.

Clamptight® Feature


Photo 1

Photo 2

Photo 3